ShopDreamUp AI ArtDreamUp
Deviation Actions


Suggested Deviants


Suggested Collections


Description
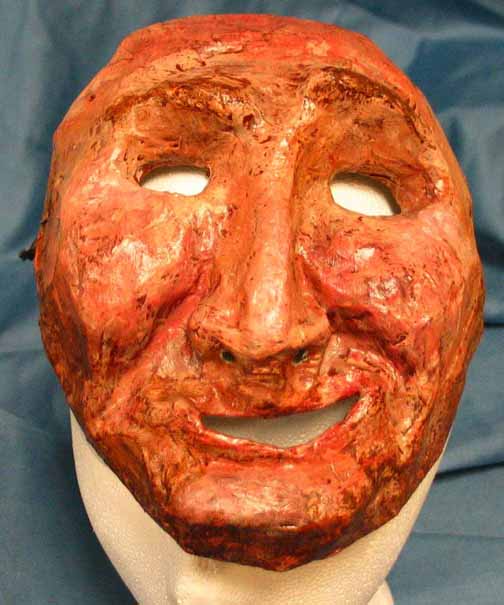
The Seeker
The original design for this was more like the Sage, but with deeper indentions around the eyes. I wanted it to have a "blind seeker" look to it, like Oedipus. The director, however, has a more 'adventurer' take on the archetype. So, it's based roughly on Indiana Jones.
Project Info
I was given the task of researching, designing, and making twelve masks based on the twelve archetypal heroes from mythological tales. Researching was easy: I had to read a book, look up pictures and take notes. Designing is when things got tricky. I wasn't in charge of the designs, really, but rather I was the pack-mule. My boss and professor was directly over me, with his boss - the head of the theater department at my school and also the director of the play the masks were for - directly over him. My boss was the first hurdle, and then his boss. Several of my original designs had to be changed to please the director.
Next came making the masks. Big challenge, that.
First, you sculpt your design out of clay. It took us a while to find a clay that wouldn't crack severely as it dried. We ended up using a type of clay called "Marblex." Excellent stuff, that. It's a gray clay.
Next, I covered each clay mold with a stuff called "Sculptey Coat." It's sort of a plastic sealant, and we had hoped it would keep the clay from cracking when we peeled off paper mache from it. Next, we lathered on vaseline and began the paper mache process. Each mask has approx. twenty layers of newspaper on it.
At first, I'd been using wallpaper paste, but that was taking too long to dry. I switched to "Modge Podge," which is a stronger version of regular white glue. After about three layers I had to peel each mask off of its mold, patch it, and reattach it to the mold to keep going. This was because I had several masks rip due to the details around the nose and mouth. Once I had enough layers on it, I let them dry.
Unfortunately, the vaseline kept them from getting completely dry in the middle, leaving them kind of floppy. I solved this delimma by sticking them in the oven (which I had heated to 170 degrees before turning off). I left them in the oven about half an hour, pulled them out and placed them on their molds. When they dried (as the glue had melted due to the heat), they were rock-solid.
After all the masks were done, I trimmed the edges and coated them in " Sculptey Coat." I then primed them with a flat brown. I used artist's acrylics to paint them, using my fingers rather than any kind of brush. I then sand papered them a little to rub off some of the paint, as the masks needed to look old. I then drilled holes for the noses, hair and elastic.
The hair is made of the corn-husk stuff you can buy at Wal-Mart and painted with silk flower spray paint (that stuff's the shit).
Finally, each mask was given a final coat of sealant and left to dry.
Image size
504x605px 39.24 KB
© 2003 - 2024 faechick
Comments0
Join the community to add your comment. Already a deviant? Log In